The Beach House : Wrap Up


wholehousehighres_text

This house is being revealed backwards – mainly because I was so obsessed with completing it that I didn’t have time to do room by room posts. This is by far and away my most favourite dollhouse renovation so far. I think mainly because it reminds me of my own house with the light, bright colours, the timber and the hint of aqua. So let’s get stuck into it!

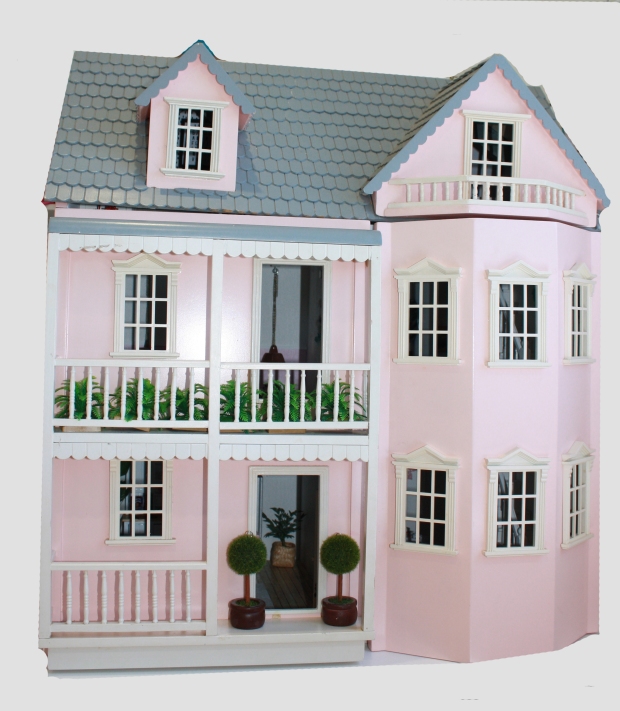
First up, I wanted to show a before and after shot of this house.

beforeaftertext

I think you’d agree there’s a pretty dramatic change (well I hope so anyway)!  This beauty sat in my garage for over a year. It’s huge and heavy – over a metre wide and is solid timber, handcrafted by a lovely grandpa. I bought it off eBay but honestly, the amount of refurb it needed was really intimidating – which is why it sat idle for so long. It was in excellent condition, just needed lots of sanding, priming and painting. Let’s talk about that for a sec.

First up, I got stuck into this beauty with an electric sander – borrowed from my 75 year-old MIL who does her own renos, including plastering (unfortunately my husband did NOT inherit this handy gene). My first time using one and man they’re loud but super effective.

sander

So after electric sanding, I used regular sand paper and a sanding block to finely do the rest. Then came a really tricky part. See in each room it has that icky greyish lino on the floor? Well that was glued down. Like seriously glued down. After I ripped up the lino, it took me about 5 hours of hard labour removing all that glue before I could sand the floors. I’m not exaggerating one bit on the time either – it was seriously 5 hours.

I tried a paint scraper but that was an epic fail. So then I used these adhesive removing wipes. These are leftovers from the 5 years my son had to patch his eye (that’s a whole other story but if you’re interested, head here). These things are rotten expensive but they weren’t going anywhere so I figured I might as well use them up. About a hundred or so later (okay, probably about 20), most of the adhesive was off. Then I took to it with a flat head screwdriver and the paint scraper – and then my fingers and fingernails. Eventually it was all gone. Then my brother-in-law came to visit and advised that metho would have gotten it off in about 3 minutes. I hate you.

So fast forward past a seething tantrum with swearing and foot stamping, and the painting was underway.

paint

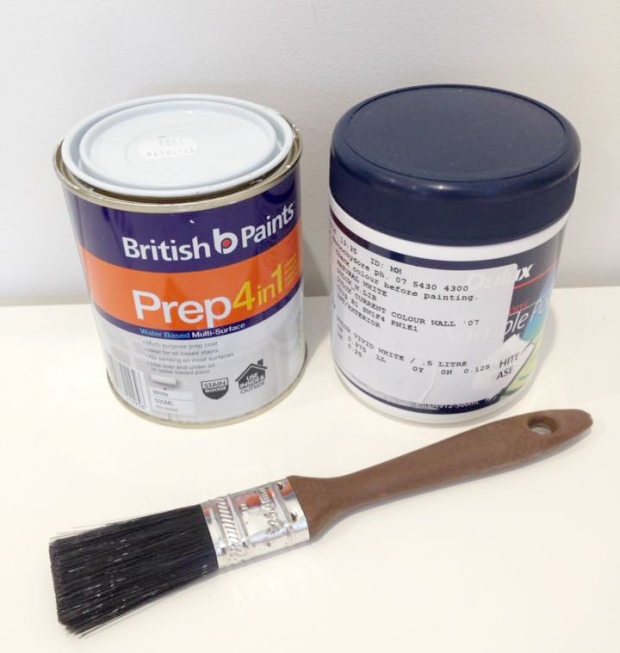
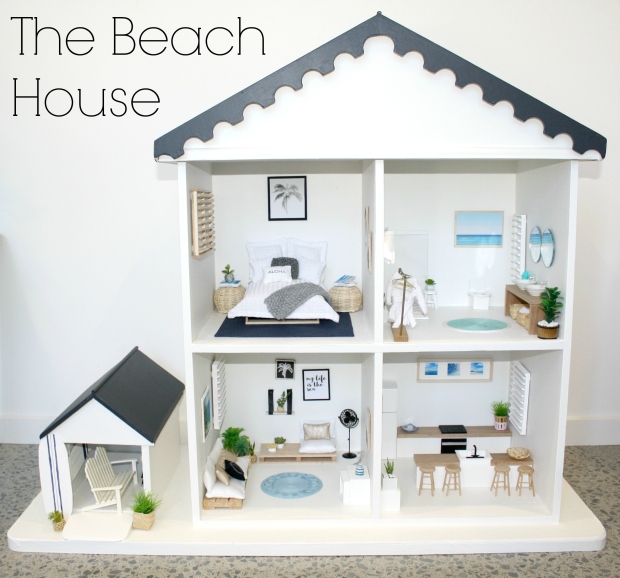
These are my weapons of choice. That Prep stuff is also ridiculously expensive but I think it’s worth it. And so, 3 coats of primer and 2 coats of paint later and voila! Couldn’t have been happier with the outcome. I wish I was allowed near a power saw of some description so I could cut that scalloping off the roof but I didn’t want to push my luck.

paintedhouse

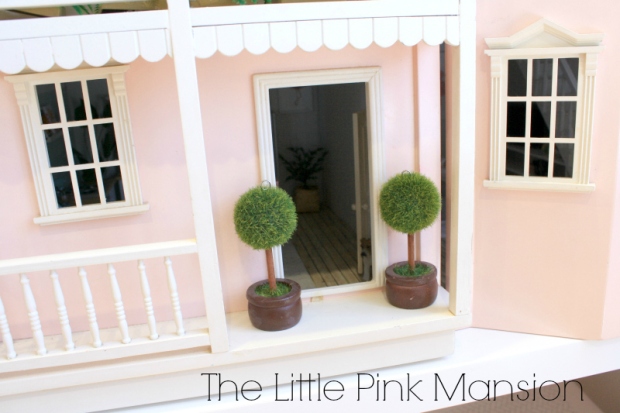
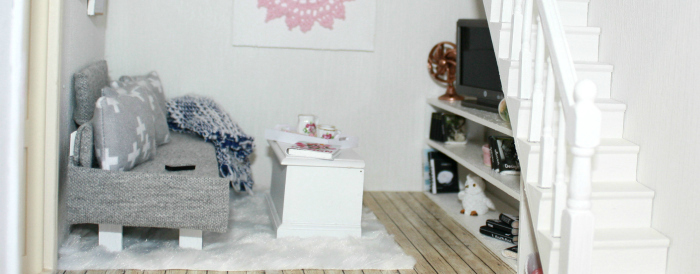
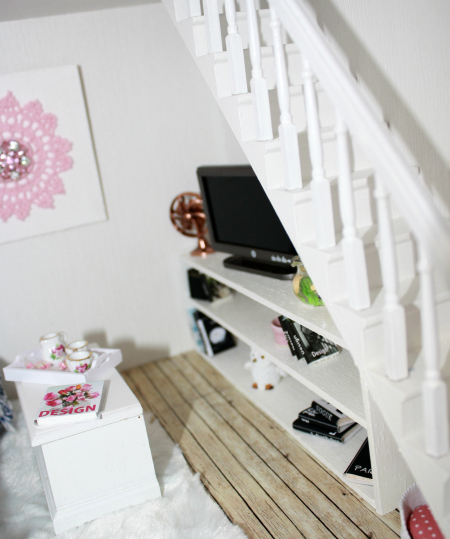
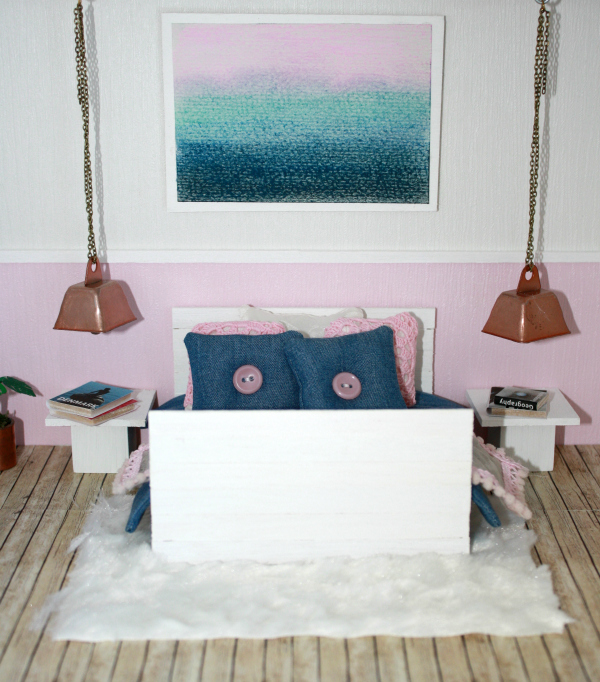
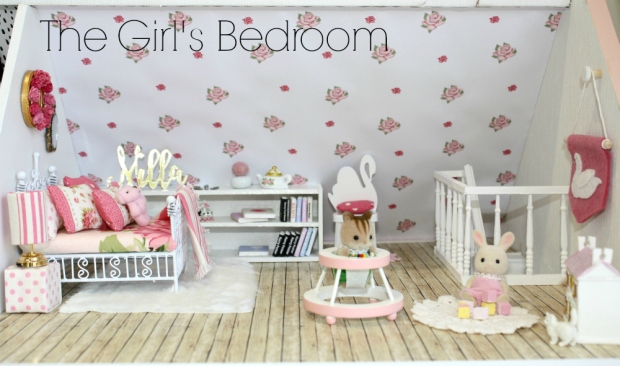
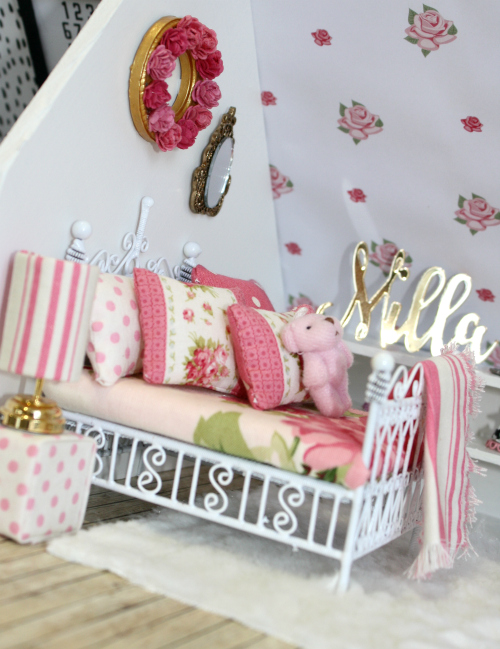
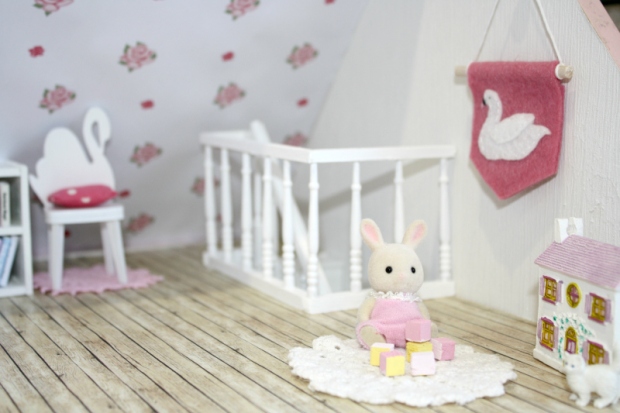
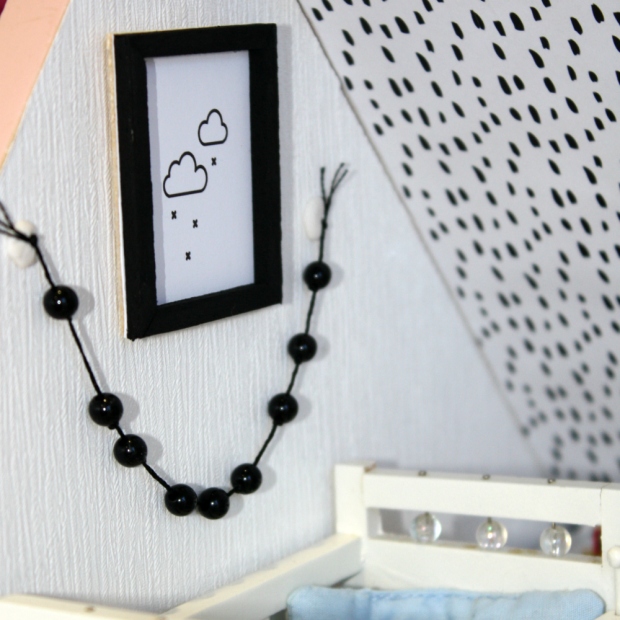
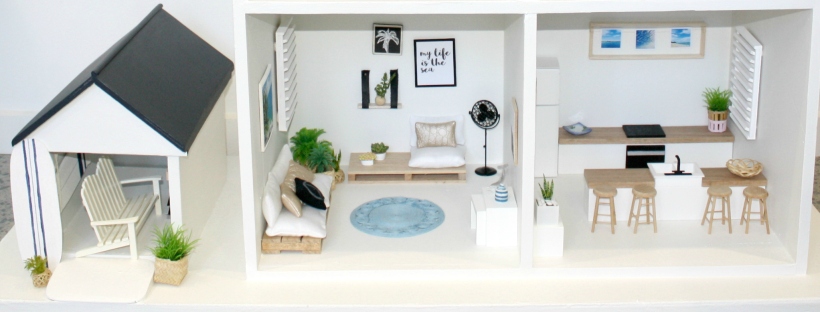
Then came the fun part – DECORATING!!!! I found this house a lot easier than others to decorate because I had a very particular style in mind. This was mainly driven by the pallet couch and bed that I bought from MiniHomeCo. There’s certainly a lot of her influence in this house but I like to think there are many of my own touches as well.

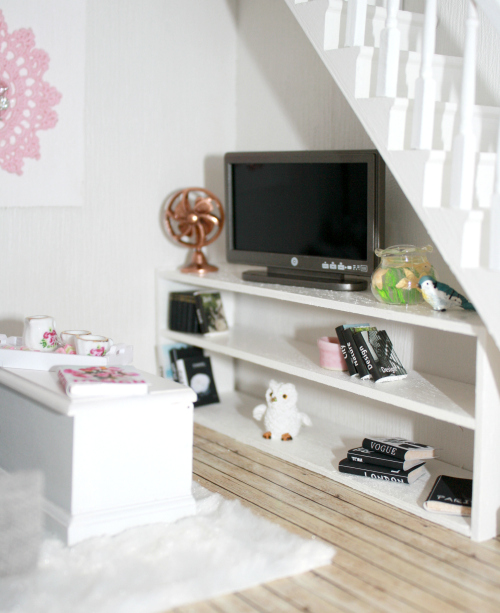
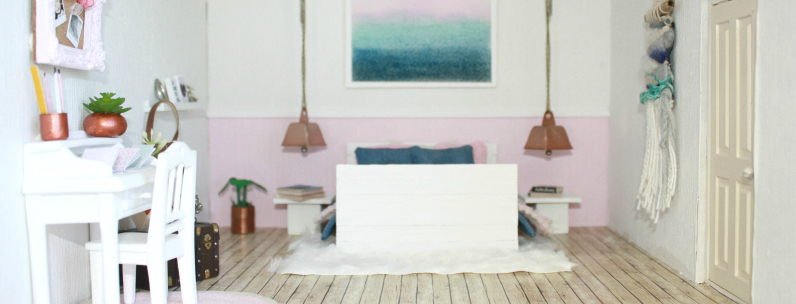
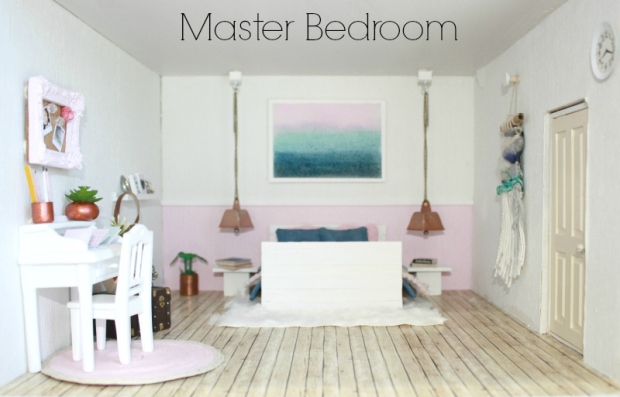
The finished result (this is my attempt at ‘styling’ my photo – clearly there’s some work to be done with this skill):

wholehousestyled

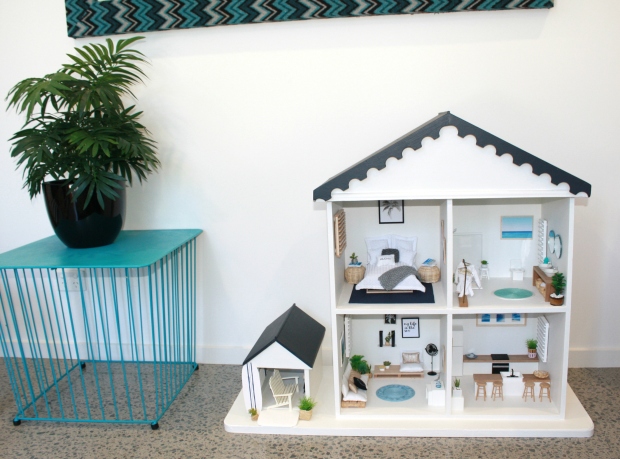
I’ll go through each room as soon as I can but for now I hope you enjoyed these pics.

roomsclose


The Little Pink Mansion : The Whole House

mansion1_text

She’s finished! The $20 Gumtree find has been spruced up and completely decorated. She’s now residing in Milla’s room where I hope she’s played with.

littlepinkmansion_wholehouse3

The outside view (unfortunately there were no doors with this house).

littlepinkmansion_wholehouse2

Doors open.

littlepinkmansion_wholehouse

In all her glory!


From top to bottom, here were the rooms for The Little Pink Mansion :

The Beginning

The Nursery

The Little Girl’s Room

The Bathroom

The Master Bedroom

The Kitchen

The Living Room


Now on to the next house…..

The Little Pink Mansion : Living Room

living2_text

The final room of the Little Pink Mansion! This ended up being a bit of a poky room, mainly due to the stairs I think. I’d pretty much run out of enthusiasm by the time I got here. Hopefully it doesn’t show too much.

living6living4

First up I made another bookshelf from balsa wood and then painted it white. Because it was a tricky space, this was the best option to fit under the stairs. The TV, fishbowl, bird and fan all came from eBay. The little books are a mixture of my designs and some from One Brown Bear.

living5

The little coffee table is actually a toy box but I think it works okay. The tray, cups, jug and sweets came from eBay, while the book is another of my designs. The little rug is one that I made.

living7

This artwork was a rushed affair. Milla and I looked through my extensive craft stash and found another pink crochet doily and a rhinestone fixing. We glued that onto a painted balsa wood frame and then stuck it to the wall. I’m not that fussed on it but she loves it so that’s the main thing.

living3

The couch next. Unfortunately I forgot how I made the couch in Milla’s Little House so this one is a bit odd. I used the same fabric as the last house and wanted a sleeker look, which I think was achieved. It’s a little wonky because the feet are glued on bits of balsa wood. I’d definitely do that differently next time. The cute little throw rug is from MiniHomeCo and the pictures are from The Printable Studio.


So that’s the final room in The Little Pink Mansion. Next up I’ll do a wrap on the whole house.

The Little Pink Mansion : The Kitchen

kitchen1_text

Mini kitchens are so much fun and this one was no exception. The actual kitchen cabinetry was a hideous bottle green one that I got on eBay. I won’t say it was a steal but it was cheaper than lots of others out there. First step was painting it all white. This was super fiddly and I can see why lots of people use spray paint. That wouldn’t be quite as therapeutic for me though. So two coats of primer and two coats of top coat later and she came up brilliantly.

img_2831

kitchen4

You can see that my painting got a bit sloppy but I’m going to call it ‘rustic charm’. The cabinets were also missing handles here and there so I just stuck on pearl beads. Bit weird but it kind of works. Kind of.

kitchen5

Here’s a close up of that cabinet and all its bits and pieces. These were sourced from Etsy, eBay and the super cute Robert Gordon inspired mugs are from Mostly Miniature.

kitchen2

I had a few things left over from the renovation of Milla’s Little House, including this wallpaper from Little Fish Creations. It’s my second favourite colour (after pink!) so decided to use it again. The word cut outs are from Petite Boulangerie and the other stuff on the bench are from Etsy and eBay.

The wall shelf is another from Mostly Miniature and the little cookbooks are made by me and are available as a digital file in my little Etsy store.

That banana leaf palm in the background was a bit of a hack. The kitchen wasn’t designed to be a corner kitchen so there was a gaping big hole between the two benches. There was just no combination that worked if I’d tried to stick them into the corner, so I just popped the palm in the hole. It looks okay.

The fridge was an eBay find, it’s wood and looks awesome in real life. That beautiful flamingo print is from Whimsy Woods. The cookbooks are again my design and available in my little Etsy store as a printable file. The flowers and crate are from Etsy too.

kitchen9

Finally is the dining table. The table and chairs both came from a store in Bali called Rosada Dollhouse. The rug is some felt that I cut up and the plant on the table is one that I constructed. Oh and the plant and basket in the background are eBay finds.

So I’m sure the little Sylvanian dolls will have a lovely time cooking up a storm in this kitchen!!

The Little Pink Mansion : Master Bedroom

master1_text

I LOVE this room. Totally love it. There’s pink and aqua and more pink. I would happily live in this room!

img_2810

The first thing I did with this room was the bed. I’d bought a bed from Tres Collective – it was a laser cut style that was then glued together. It was great but just didn’t quite fit the bill. So I gave it a bit of a hack and glued balsa wood strips to the two ends and then white washed them (just with white paint). Then I made a mattress out of fabric scraps and batting, followed by the bedspread from some denim fabric. The pillows/cushions are made from more denim fabric, crochet doilies and other fabric scraps I had. The throw is made from some lining sort of fabric that I had, which I then trimmed with pom pom trim. I was so happy with how this all turned out.

Next up were the pendant lights and bedside tables. These lights aren’t really lights at all but are actually bells. But I just loved the way they looked and wanted some more of the copper look coming into the room. I hung them with some jewellery chain and then into the ceiling. The bedside tables are big wooden square beads with a balsa wood top, painted white. The little books are my own creation (which you can buy in digital format in my Etsy store).

master2

It didn’t come next because I deliberated for about a month on what to put here, but next let’s talk about the painting above the bed. I’d had my eye on a gorgeous print from a local photographer but got a bit frustrated with the process so one weekend, I pulled out the kids’ craft box and found some pastels and pastel paper. Voila! I’m not much of an artist but I love the way this little artwork turned out.

master3

This beautiful hanging was made especially for me by Tiny Perfect World. You might recognise it from Milla’s Little House living room. It’s just so beautiful I couldn’t part with it when I sold that house, so I put it in the Little Pink Mansion because it was staying here with us. It worked so well in the Pink Mansion.

Next up was the little desk area. Initially I thought it was a bit weird to have a desk in a bedroom but my English friend Dubhe told me that proper ladies often have one, so it must be the done thing. The little desk and chair come from Bali – a little shop called Rosada Dollhouse. I want to go back to Bali just to go shopping there again!

The pinboard was inspired by MiniHomeCo and I just printed pics of my real life babies and glued them on there. Added some beads and a paper flower and it was good to go. The pencil set was originally a seaside sort of theme so that was painted in copper paint. The little succulent is one that I sell in my little Etsy store. The notebooks I just created and printed out.

Next to the desk is the trunk. Milla and I saw this online and decided we had to have it in the house. It’s decorated with a plant that I sell in my Etsy store and a little pewter owl that I got online.

master4

Finally the little wall shelf helped fill up a bit of a blank space on the wall. The super cute handbag comes from Mostly Miniature. The art prints are just freebies I found online that I printed and glued to some painted balsa wood. The mini mirror came from a dollhouse fair and the clock from eBay. That little monstera plant in the corner came from Mostly Miniature.

As I said, I’m in love with this room. But it’s on to the kitchen!


The Little Pink Mansion : Bathroom & Landing

bathroom1_text

The bathroom and landing were a little tricky. This was just one big room (you can see that here) but I put in a wall to create a bathroom. Fiddly business. Once the wall went in those stupid stairs seriously took me about 3 weeks and countless sleepless nights to figure out. I don’t have one of those brains that easily work out mechanical type stuff – I can’t picture how things will work but have to physically do it. So it took ages. Once done though, I think they look okay. The groovy gold paintings on the back wall are scrapbooking thingies that I just put my own photographs into (Milla chose them). Those hideous pink and green frames are scrapbooking doodads and I got lazy and whacked some gold felt behind them and stuck a flower thing on top.

So on to the bathroom.

bathroom2

It’s quite narrow in the end. The herringbone wallpaper is just a pic I found online that I printed out (pretty sure I keep Officeworks in business). The vanity I made from balsa wood – and the basin is too. It’s pretty flimsy but I’m not brave with power tools so I’m too scared to cut real wood. That bathtub is a cheapie from the $2 shop and I just spray painted it, painted the tap black and stuck some herringbone paper on the front.

bathroom3

The towel rail is balsa wood again and the towel just a scrap of fabric I had lying around. That groovy bathmat is felt from Spotlight and the scales were once blue but got attacked with a Sharpie pen.

bathroom4

The little swan planter is my absolute fave thing in this room. It comes from Mostly Miniature.

bathroom6

Because this is such a narrow room it made the ceiling seem REALLY high. So I put this hanging pot plant in the corner to try to fill the space a bit. That mirror is just a piece of mosaic mirror. I have like 20 of them left over if you want one (I don’t know what I was thinking).

bathroom5

So that’s the bathroom and landing all done. Onto the master bedroom next! Woo hoo!

The Little Pink Mansion : Little Girl’s Room

girlsroom1_text

Okay, so I’ve been slack. This dollhouse has been dragging on. And on. And on. I completely missed the deadline of the first week of November – not that I was too worried considering my client was my daughter. But most of it’s done, so I’ll just add in the blog posts as I can. If you’re after more recent pics you can find me on Insta @millamaloo
Right now is the little girl’s room. This one is super pretty and girly – just the way my daughter wanted it.

First up is the floral wallpaper. I took ages trying to find exactly what I wanted with this ones. I tried swans, princesses and flamingos, all to no avail. Eventually I just created this one from some pics that I’d used to create my SIL’s baby shower invitation. I think they’re from freepic but I can’t remember. Only two trips to Officeworks to get this one printed and voila!

girlsroom2

The bed was Milla’s choice that she found at a miniatures fair we went to together. I didn’t love it at first (especially the fluro pink mattress it came with) but it’s grown on me. The bedding is all made by me, as is the bedside table and lamp. This lamp actually lights up, which Milla adores.

The little floral wreath above the bed I made with a scrapbooking frame and paper flowers. The little mirror was another miniatures fair find and Milla’s choice again.

girlsroom9

This super cute name cut out is from Petite Boulangerieau (she has a shop on Etsy too if you can remember how to spell the ‘b’ word).

The shelves are another handmade balsa wood number. The little books are all made by me and feature some of Milla’s favourite books. And now let’s talk about the swan chair. Oh my squeals, it is AWESOME!!! It comes from one of my fave mini makers Mostly Miniature. The little cushion is one I whipped up from scrap fabric.

girlsroom11

These stairs and balustrading were an absolute biatch. NEVER AGAIN!!!!! Buying the ones that are already put together would have been the much smarter option. Anyhoo, once they were done (only took me 3 weeks), it was smooth sailing. Cuteness overload now with the little dollhouse (inside a dollhouse – whhhat?!?!). Milla picked that one out again at the miniatures fair and the beautiful swan flag is from All Things Miniature.  The little white cat moved in from Milla’s Little House (you know, the one she sold because she wanted this upgrade – sheesh).

Here’s some more cutie patootie Sylvanian babies just because I can’t get enough of them.

There we have it. Girl’s room done. Next is the bathroom. I do love a mini bathroom and the monochrome is back!!!!


The Little Pink Mansion : The Nursery

nursery6_text

After doing all the groundwork on The Little Pink Mansion, it’s been awesome to actually get to do some pretty stuff -well, cute I suppose, not so much ‘pretty’. For some reason I feel the need to start at the top of a dollhouse and work my way down. I’ve no idea why. So once again, this room is at the top, in the attic.

After putting in the wall to create two bedrooms, this little room became the baby’s room.

The little cot was a second hand eBay find. It had a lovely floral mattress which I just covered with white fabric. The blue pillow came with the cot  but the gorgeous little panda cushion came from All Things Miniature. The blue pom pom rug is one that I made and formed the base of the room, as my daughter insisted it go into this room.

nursery4

The super cute artwork here came from One Tiny Tribe – it was a freebie that I just mini-afied. The black garland was leftover beads that I had lying around. Please ignore the delightful blobs of white-tac holding it up!

I love this little chair that I picked up from a miniatures fair. The darling D cushion is also from All Things Miniature (you can actually choose any letter you like to have stitched on it). The little bookshelf is from eBay – unfortunately the little books are glued in there but it still looks cute. The ‘wall art’ is just a few scrapbooking embellishments.

This cute little artwork is from Little Boom Prints on Etsy. Again, I just mini-afied it and made a frame (I’m getting much better at mitre corners thank goodness!). That white shelf you can see at the bottom is just made from balsa wood and then spray painted. I was pretty chuffed with how it turned out. Then there are all the lovely little toys that adorn the shelves. These came from eBay and a miniatures fair that I went to.


So that’s the nursery all done and dusted. It’s onto the little girl’s room now – finally some pink back in my life!

nursery6


The Little Pink Mansion : Beginnings

littlepinkmansion

And so another house begins….

This little beauty I got off Gumtree for the grand price of $20. It was filthy dirty, was missing two doors and was a bit roughed up inside. Unfortunately it was also missing a staircase and the one that it did have, was broken.

img_2299

You can see the lovely glue on the wall joins.

A few coats of paint, some paper flooring and wallpaper and voila!

img_2496

The flooring paper is an image from Shutterstock. I was leaning towards a white washed floor but my fussy customer (my 8 year old daughter) wanted these floors. Four trips to Officeworks to get them printed and they turned out pretty awesome. They were ModPodged on, which wasn’t great – definitely double sided tape works so much better. The black dot wallpaper is from MostlyMiniature and the roses were an image from Freepik that I turned into wallpaper.

After this, it was time to add some extra walls. On the attic level, I put in a wall so I could have a nursery and little girls room (at my daughter’s request of course!). This was just MDF board painted and glued in.

img_2530

Then it was putting in a wall to create a bathroom and hallway.

Before is on the left and after is on the right.

So the basics are done. Now on to the fun stuff!!!

Milla’s Little House : The Whole House

Milla's Little House Text

It’s DONE! Milla’s Little House is finished. The sad news is Milla has decided she wants an upgrade on her house after I found a pink Victorian dollhouse on Gumtree for $20. So this house will end up finding a new home eventually.

But here is the house in all its glory – from top to bottom.

Girls_room_text

The Little Girl’s Bedroom (and playroom) was the first room and came out so pretty.

Bathroom1Text

The Bathroom I’m in love with (actually, who am I kidding, I love this whole house).

MainBedroomText

The Master Bedroom was a mind stretch but I finally got there.

Kitchen_Text

Aargh I LOVE the Kitchen (even if it is missing a fridge). And look at little Ralph sitting so nicely on the mat there. What a good boy.

And finally……..

LivingRoomText

The Living/Dining Room. I could live there (actually I kind of do because a lot of this is modeled off my real life house).


So there it is. All done. I’m excited to get stuck into the pink mansion now!